

Here is my first attempt at a tutorial using Photoshop CS5. Many of the photo editing tips I will show have been self-taught so we can be learning together. Please always feel free to make comments if you give this technique a try for us all to learn together.
Here I am blending two images with different focal points to make one image with sharpness front to back using CS5. I knew there was a process to do this even though I've never had great success at it, but I still shoot many images with merging them later in mind. Always a good thing to keep in mind, even if you can't do it yet, take the images for when you have found the way to create the magic. Memory is cheap.
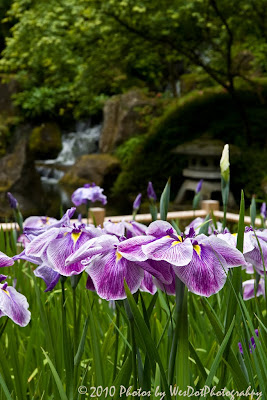
I have recently found CS5 has a very easy process to make this happen. It is most useful on subjects with no movement. These images above are not a perfect subject but I included a step to help align the subjects.
These two images above were shot on an overcast day and in the shade. A good setting to cut my teeth on as there was a slight breeze and low light preventing a small aperture.
Camera settings:
- ISO 200, 1/50 second at f.11.
- It always helps to have a camera set on a sturdy tripod.
- Manual setting with the first image focusing on the foreground and the second focusing on the background.
CS5 Post-Editing Steps:
- In Camera Raw, select the images you will be using. To do this select your first image by clicking on the thumbnail. Then while holding the Ctrl button select each thumbnail to include it. In my case I had only 2 images but you can use several images with varying focal point front to back.
- Select Tools>Photoshop>Load Files into Photoshop Layers.
- If as in my example you know there was movement in the subjects, select both layers by holding down the Ctrl button and clicking on all layers.
- Select Edit>Auto-Align Layers which will bring up a dialog box where you click on the Auto button, then OK.
- Now to work the focus blend magic you select Edit>Auto-Blend Layers selecting the Stack Images button and clicking the Seamless Tones and Colors box. Then click OK.
This will show you the complicated masking and blending that CS5 will do behind the scenes for you. It's not always perfect so you might need to go into the masks and make some manual adjustments by using the brush tool and painting with black (to conceal) or white (to reveal) areas that aren't quite right. But you will get the idea the more you play around with it.
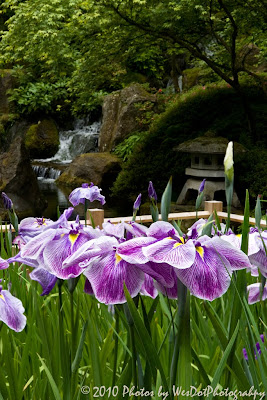
Here is my final result with the sharpness front to back even under low light conditions.
No comments:
Post a Comment